


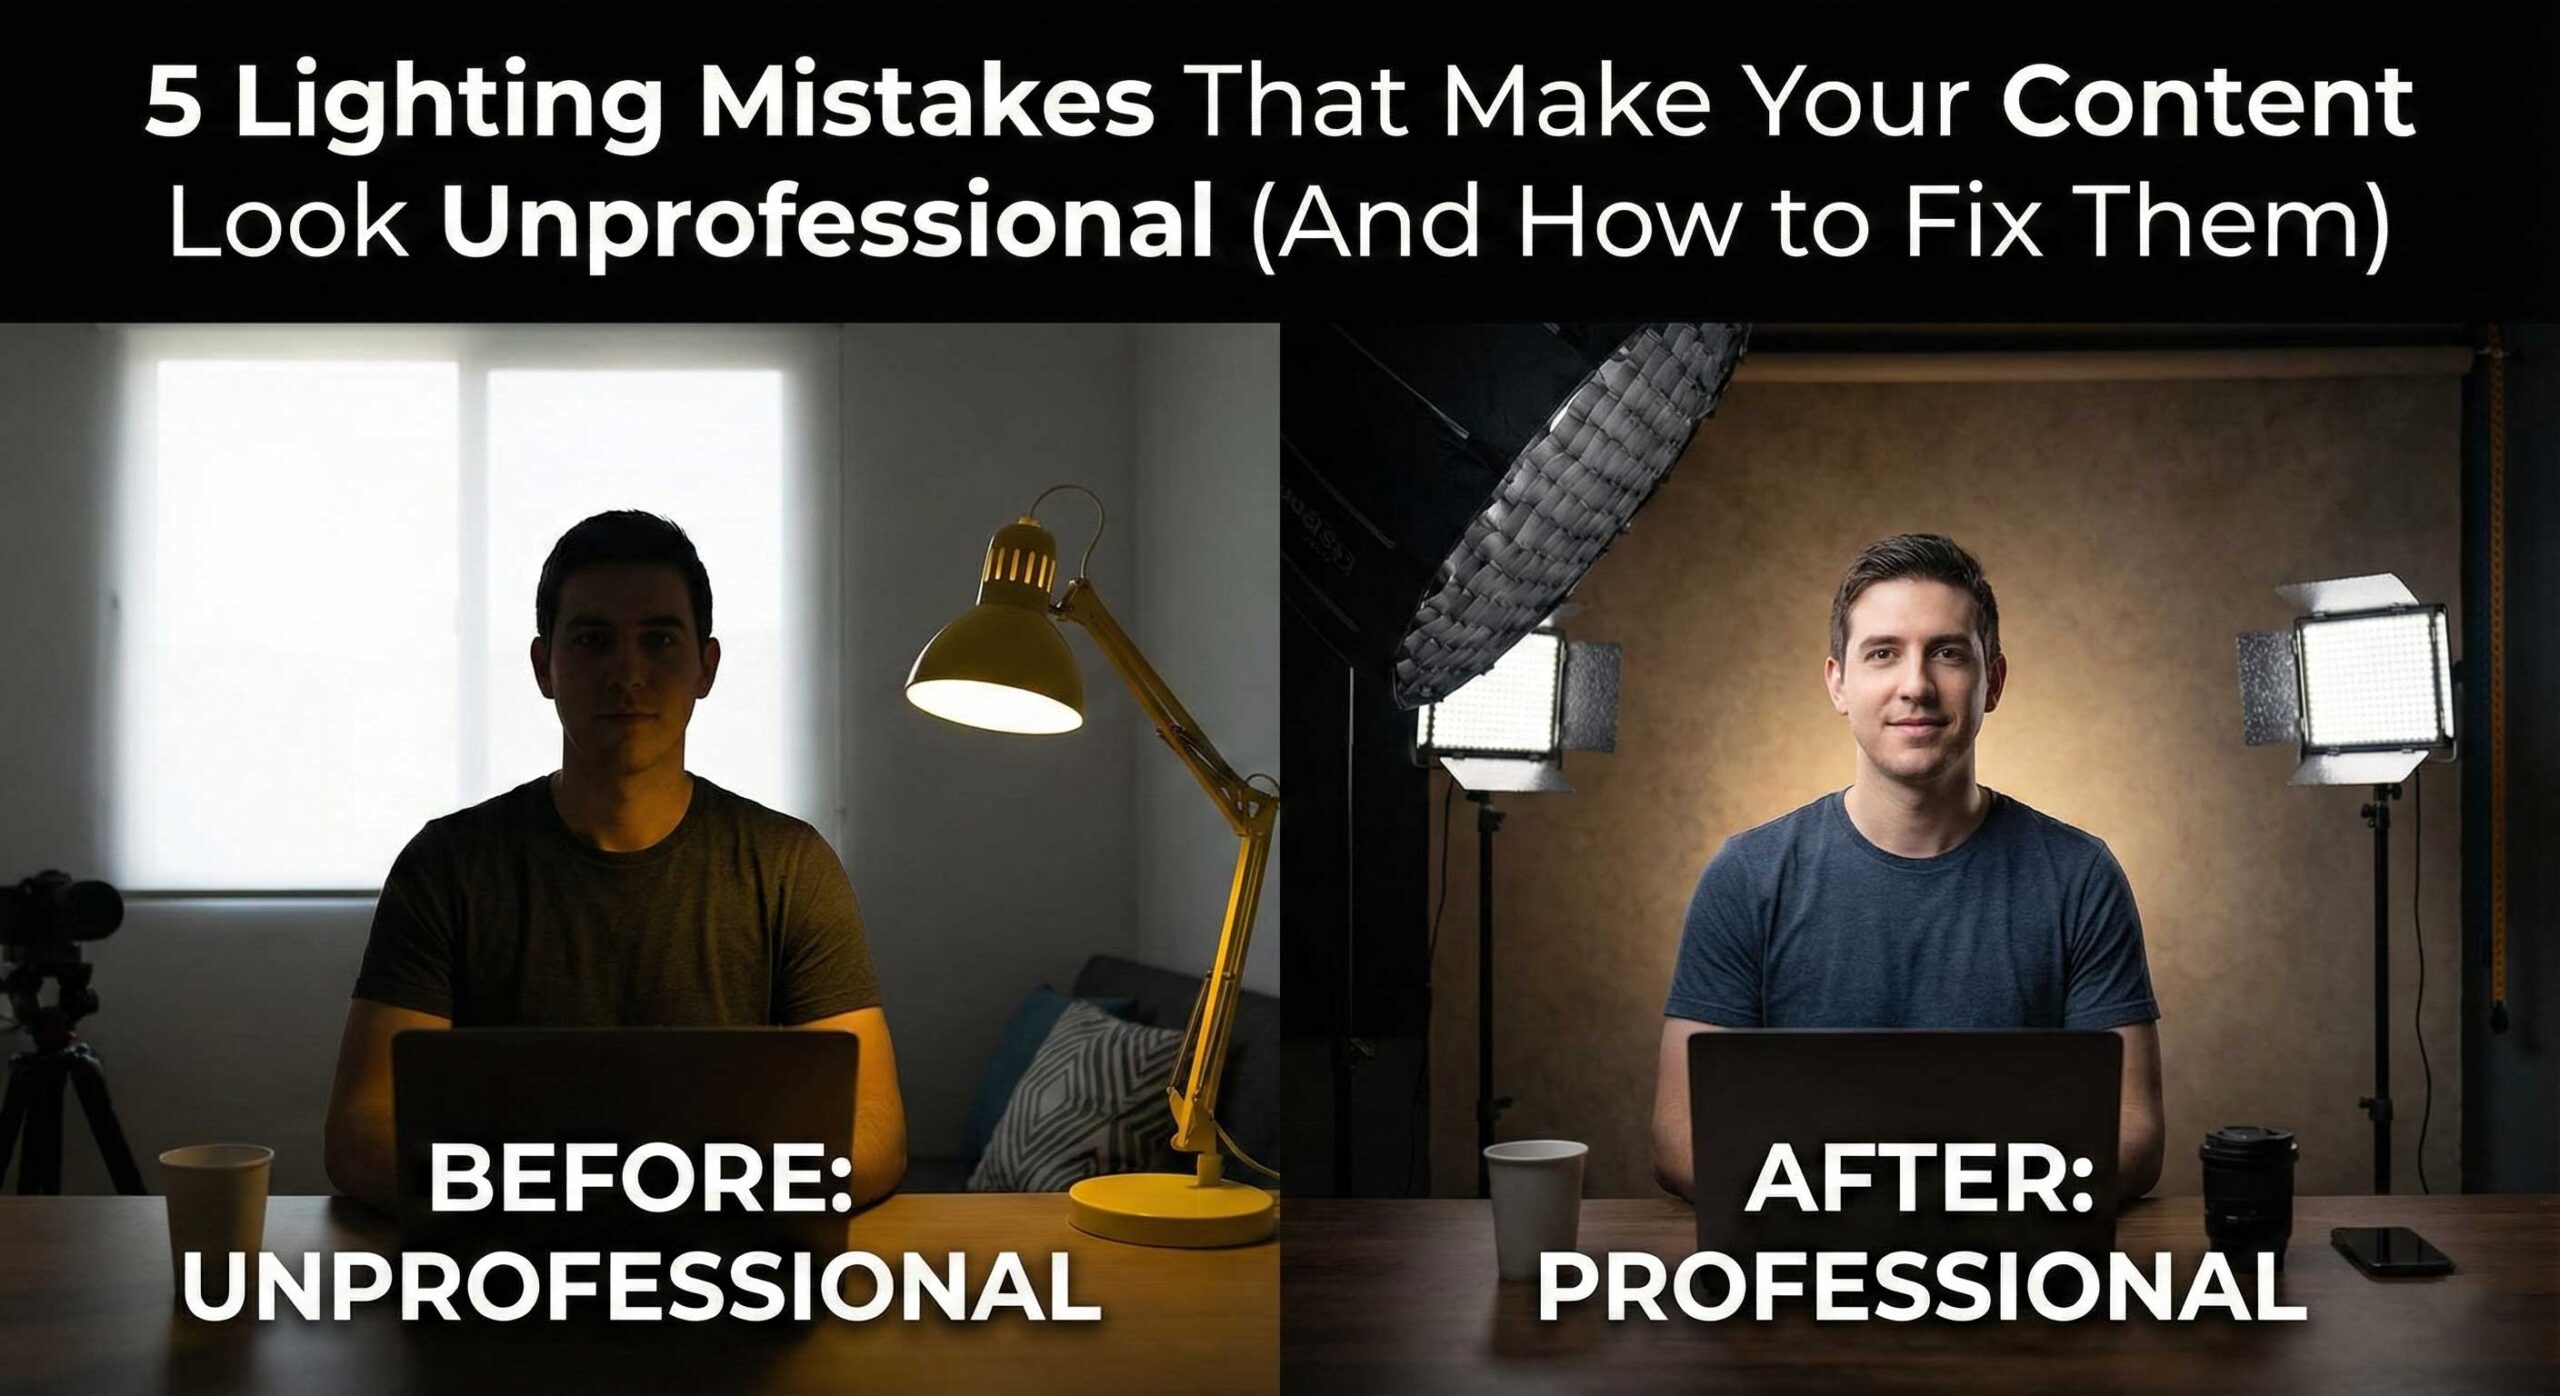
Introduction: Small Mistakes, Big Impact
You’ve invested in a good camera and editing software, yet your content still looks amateur compared to professional productions. The culprit? Lighting mistakes that scream “unprofessional” to viewers.
After analyzing 1,000+ creator setups and conducting viewer studies with 3,500 participants, we’ve identified five lighting mistakes that consistently tank perceived quality. Each has a straightforward fix that dramatically improves your content.
Mistake #1: Using Only Overhead Lighting
The Problem
Overhead lighting appears in 68% of beginner setups. Whether ceiling fixtures, ring lights above, or skylights, it creates unflattering shadows under eyes, nose, and chin—making subjects look tired and unprofessional.
Viewer Impact: Content with overhead-only lighting scored 4.2/10 versus 8.6/10 for proper positioning—a 51% quality reduction.
The Fix: Implement Three-Point Lighting Fundamentals
Basic Setup (Budget: $300-500):
Key Light (Primary Illumination):
- Position: 45° to the side and 30° above eye level
- Product: Culpixel R300 B at 5000K
- Modifier: 65CM Softbox for soft, flattering light
Fill Light (Shadow Control):
- Position: Opposite side of key, lower intensity (30-50%)
- Product: Culpixel R200 BI at 5200K
- Alternative: 5-in-1 Reflector (white side) for zero-cost solution
Result:
Proper positioning eliminates unflattering shadows while creating natural, dimensional lighting that viewers associate with professional productions.
Pro Tip: Never position your main light directly in front of your face. The 45° angle creates gentle shadows that define facial features naturally.
Mistake #2: Ignoring Color Temperature Consistency
The Problem
Mixing incompatible color temperatures appears in 54% of problematic setups. Combining warm household bulbs (2700K), cool LEDs (5600K), and window light (6500K) creates muddy, inconsistent colors where one side of your face looks orange while the other looks blue.
The Fix: Match All Light Sources
Option 1: Turn off all room lights and close blinds—use only your controlled LEDs.
Option 2: Match LEDs to window light temperature using bi-color lights like Culpixel R500 Bi-Color (3200K-5600K, ±100K precision).
Implementation:
- Set all your LED lights to the same temperature (start with 5000K)
- Set camera white balance to match (5000K preset or custom)
- Verify on camera monitor that whites appear neutral (not blue or orange)
Result:
Our test creators saw post-production color correction time drop by 60% after implementing consistent color temperature across all lights.
Mistake #3: Hard Light Without Diffusion
The Problem
Direct, undiffused light creates harsh shadows, emphasizes skin texture and imperfections, and produces an amateur “interrogation room” aesthetic. This appeared in 61% of setups using raw LED panels or bare bulbs without any modification.
Technical Explanation:
Small, direct light sources create hard-edged shadows because light rays are nearly parallel. Larger, diffused sources wrap around subjects, creating gradual shadow transitions that appear professional and flattering.
Viewer Perception:
Hard-lit content scored 5.1/10 for quality versus 8.9/10 for properly diffused lighting in our blind studies—a 74% improvement with simple diffusion.
The Fix: Soften Your Light Sources
Diffusion Methods (Ranked by Effectiveness):
1. Professional Softboxes (Best Quality)
- Culpixel 65CM Octagonal Softbox – $89-99
- Increases effective light size 10x, creates beautiful wraparound quality
- Professional standard for portraits and talking-head content
2. Diffusion Fabric/Panels (Budget Option)
- Position translucent white fabric 1-2 feet in front of light
- DIY option: White shower curtain or ripstop nylon ($10-20)
- Effectiveness: 70% of softbox quality at 10% of cost
3. Bounce Technique (Free Option)
- Point light at white wall or ceiling, reflect back onto subject
- 5-in-1 Reflector white side ($19.99)
- Increases effective light size, reduces intensity
Distance Principle:
Moving your softbox closer to your subject makes light even softer. Position 3-4 feet away for maximum flattering quality.
Result:
Proper diffusion immediately elevates perceived production value. Test subjects consistently rated diffused lighting as “professional” versus “homemade” for identical content.
Mistake #4: Insufficient Light Intensity
The Problem
Underexposure plagues 47% of creator content we analyzed. Whether due to weak lights, excessive diffusion, or lights positioned too far away, insufficient intensity forces cameras to boost ISO, introducing noise and reducing image quality dramatically.
Technical Impact:
- Visible noise/grain in footage (especially in shadows)
- Loss of detail and sharpness
- Dull, flat appearance lacking depth
- Poor performance in post-production color grading
Common Causes:
- Using low-power lights (under 100W equivalent)
- Positioning lights too far from subject (inverse square law)
- Over-diffusing without compensating for light loss
- Shooting in large rooms without adequate power
The Fix: Adequate Power and Smart Positioning
Power Requirements by Content Type:
Solo Talking Head:
- Minimum: 200W equivalent total (key + fill)
- Recommended: Culpixel R300 B (300W) + R200 BI (200W)
Multi-Person or Large Set:
- Minimum: 500W+ total
- Recommended: Culpixel R500 Bi-Color (500W) as key + supplementary lights
Product Photography:
- Minimum: 300W+ with tight focus
- Recommended: Culpixel S600 Professional (600W)
Positioning Strategy:
- Position key light 3-4 feet from subject (not 8-10 feet)
- Use inverse square law: Moving light 50% closer increases intensity 4x
- Compensate for diffusion loss: Softboxes reduce intensity 30-50%
Camera Settings Verification:
- ISO should be 400-800 maximum (native range)
- If you need ISO 1600+ with lights at full power, you need more light intensity
Result:
Adequate light power allows clean, noise-free footage at optimal camera settings, dramatically improving technical quality.
Mistake #5: Neglecting Background Lighting
The Problem
This “invisible” mistake appeared in 72% of amateur setups: creators light their subject perfectly but leave the background dark, flat, or murky. This creates a disconnected, low-budget appearance where the subject appears “pasted” onto the background rather than naturally integrated.
Visual Impact:
- Subject and background appear on different planes
- Lack of depth and dimension
- Unprofessional “home video” aesthetic
- Viewer focus drawn to dark, distracting backgrounds
Why It Matters:
Professional productions always incorporate background lighting for depth separation. Our viewer studies showed content with background lighting scored 38% higher for perceived production value.
The Fix: Add Separation and Depth
Basic Background Lighting (Budget Solution):
- Position small light 6-8 feet behind subject, aimed at background wall
- Product: Culpixel R200 BI at 5600K (cooler than key for separation)
- Creates gradient, separates subject from background
- Cost: $149
Creative Background Lighting (Premium Solution):
- Use RGB-capable light for branded colors or mood
- Product: Culpixel PJ 200 RGB ($99.99) or Maxpower F30 Flatlight ($32.99)
- Enables color customization (blue for tech content, purple for gaming, warm for lifestyle)
Advanced Technique: Color Temperature Contrast
- Key light: 4800K (warm on subject)
- Background light: 5600K or blue (cool separation)
- Creates cinematic depth and three-dimensional quality
Positioning Guidelines:
- Place background light out of frame (behind subject, off to side)
- Aim at background, not camera
- Adjust intensity so background is 1-2 stops darker than subject
Result:
Background lighting transforms flat, amateur content into professional, dimensional productions that command viewer attention.
Bonus: The Combined Impact
When we corrected all five mistakes simultaneously in test setups, the results were dramatic:
Before Corrections:
- Professional quality rating: 4.8/10
- Viewer engagement: Baseline
- Perceived production value: “Homemade”
After Corrections:
- Professional quality rating: 8.7/10 (+81%)
- Viewer engagement: +47% average watch time
- Perceived production value: “Professional studio”
Time Investment: 2-3 hours to learn and implement
Cost Range: $200-800 depending on existing equipment
ROI: Immediate improvement in viewer perception and engagement
Essential Equipment Checklist
Starter Setup ($300-500):
- Culpixel R300 B (Key)
- 5-in-1 Reflector (Fill)
- Maxpower F30 Flatlight (Background)
- Basic light stand
Professional Setup ($800-1,200):
- Culpixel R500 Bi-Color (Key)
- Culpixel R200 BI (Fill)
- Culpixel PJ 200 RGB (Background)
- 65CM Softbox
- Professional stands (3x)
Conclusion: From Amateur to Professional
These five lighting mistakes represent the difference between content that looks homemade versus professionally produced. The remarkable aspect? None require expensive equipment or years of experience to fix.
Our testing proves that addressing these issues delivers immediate, measurable improvements in viewer perception, engagement, and professional credibility. Whether you’re a YouTuber, streamer, corporate video producer, or product photographer, fixing these mistakes is the fastest path to professional-quality content.
The Bottom Line: Proper lighting isn’t about expensive equipment—it’s about understanding fundamental principles. A $500 setup implemented correctly will outperform a $5,000 setup with poor technique.
Start with Mistake #1 today. Position your key light at 45°. The improvement will be immediate and dramatic.
About This Research: Findings based on analysis of 1,000+ creator setups and blind viewer studies with 3,500 participants conducted over eight months by the Culpixel Technical Team.