


In today’s digital world, the production studio in your pocket—your smartphone—is more powerful than ever. You can shoot, edit, and publish 4K video from a single device. But there’s one thing that instantly separates grainy, amateur-looking content from a crisp, professional production: lighting.
Your smartphone’s small camera sensor is starved for light. Without enough of it, your videos become noisy, colors look dull, and your subject gets lost in the shadows. This guide will walk you through every step of mastering light, from using the sun for free to building a simple, budget-friendly pro setup.
Why Lighting is the Secret Ingredient to Pro Content
Before we dive into the “how,” let’s understand the “why.” Good lighting does more than just make your video brighter.
- Professionalism & Quality: It’s the number one indicator of production value. A well-lit video immediately looks more credible and professional.
- Mood & Tone: Soft, warm light feels intimate and cozy. Hard, cool light can feel sterile, intense, or dramatic. As the makers of the Culpixel R200 BI say, it’s about transforming a vision into an “emotional experience.” Lighting is your primary tool for storytelling.
- Depth & Dimension: Flat lighting makes your subject look like a 2D cutout. Using light and shadow correctly (which we’ll cover) creates depth and makes your subject “pop” from the background.
- Flattery: Good lighting smooths skin, brightens eyes, and makes you (or your subject) look your best.
Chapter 1: Mastering the Sun – The Power of Natural Light
The best light source is powerful, high-quality, and 100% free. Before you spend a dollar, learn to master natural light.
The Golden Hour: Nature’s Cinema Light
The “Golden Hour” is the period shortly after sunrise and shortly before sunset. During this time, the sun is low in the sky, creating a soft, warm, and cinematic light with long, beautiful shadows. It’s almost impossible to get a bad shot during this time.
Pro Tip: Plan your outdoor shoots for this window. For indoor shoots, the light coming through a window during this time is magical.
The Window Warrior: Your Giant Indoor Softbox
The single most effective tip for indoor shooting is to face a large window. A window acts as a giant “softbox,” diffusing the harsh sunlight into a soft, flattering light that wraps around your subject.
How to use it:
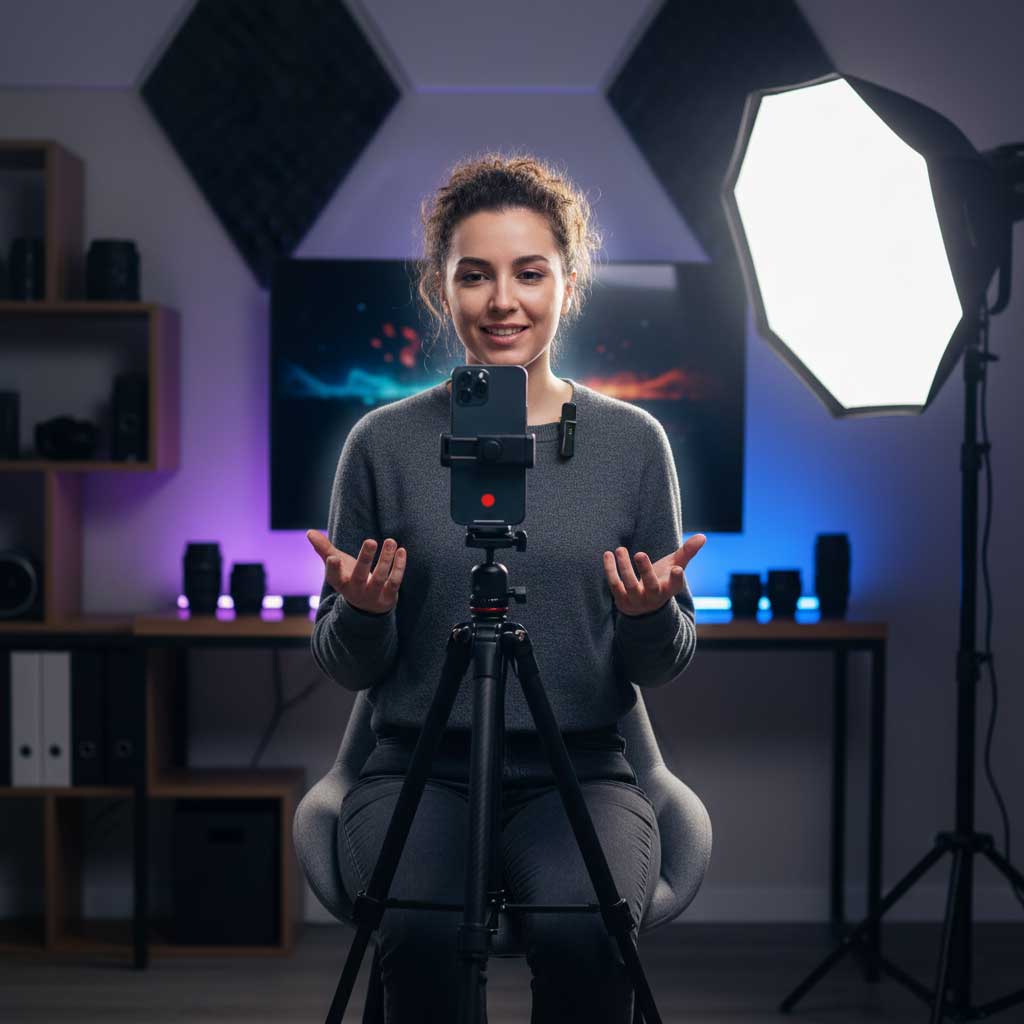
- Place your smartphone on a tripod between you and the window.
- Position yourself or your subject facing the window.
- Ensure no other lights in the room are on. Mixing indoor (warm) light with window (cool) light will confuse your camera’s white balance.
Common Mistake: Never shoot with a bright window behind your subject. This turns your subject into a dark silhouette and “blows out” (overexposes) the background.
Taming the Sun: Diffusers and Reflectors
Sometimes, direct sunlight is too harsh, creating “hot spots” and dark shadows.
- DIY Diffuser: If the sun from your window is too direct, hang a thin, white, sheer curtain. This will instantly soften the light.
- DIY Reflector: If one side of your subject’s face is in shadow, use a simple piece of white foam board (or cardboard covered in aluminum foil) to bounce light from the window back into those shadows.
Chapter 2: Building Your Studio – An Introduction to Artificial Light
Natural light is fantastic, but it’s unreliable. For consistency—especially for shooting at night or in dark rooms—you need artificial light.
The Ring Light: The Vlogger’s Best Friend
A ring light is the most popular starting point for content creators. It’s a single circular light that you often shoot through.
- Pros: Creates a very flat, flattering light with minimal shadows. It also produces that signature “catchlight” (a ring of light) in the eyes.
- Best For: Single-person vlogs, makeup tutorials, TikToks, and talking-head videos.
- Downsides: Can be less “cinematic” and can create strange reflections if the subject wears glasses.
LED/COB Lights: The Professional’s Choice
While ring lights are great, “Chip on Board” (COB) or LED panel lights are the true workhorses for professional creators. They offer more power, versatility, and control.
- For the Storyteller: A light like the Culpixel R200 BI is a perfect example. Its potent 200W core (20,200 Lux) gives you the power to “sculpt every photon” and shape your narrative. Its seamless Bi-Color functionality (3200K-6500K) lets you match any ambient light, from a warm “golden hour” glow to cool daylight, all manageable from a remote control.
- For the Creative Technician: For even more granular control, the Cuplixel S600 offers an extremely high Color Fidelity (CRI: +96) and a wider bi-color range (2700K-7500K). With 36 built-in FX modes, you can simulate anything from a lightning storm to a flickering TV, adding immense production value with the click of a button.
Softboxes: The Key to Buttery-Soft Light
A softbox is technically a “modifier,” not a light itself. It’s a fabric box that you put over a COB light (like the R200 or S600) to diffuse and soften its output. Its job is to turn a bright, concentrated light source into a large, soft, flattering “window light.”
- Pros: Creates the most flattering, professional, and soft light.
- Best For: Professional portraits, interviews, and product photography.
Chapter 3: Pro Techniques for Your Smartphone
Ready to graduate to the pro level? It’s not about the gear; it’s about how you use it.
The Classic Three-Point Lighting Setup (Simplified)
This is the foundation of all professional lighting. It uses three light sources to sculpt your subject.
- Key Light: This is your main, brightest light. Place it at a 45-degree angle to one side of your subject. This creates a “primary” side of the face.
- Pro-Level Option: For a truly professional studio, a powerhouse like the Culpixel COB AC 300 R500 W is the ultimate key light. Its massive 500W output (over 62,000 Lux) can overpower daylight or light a large set. Its ultra-high color accuracy (CRI > 97) means your skin tones and product colors will be perfect every time, and its “Silent Mode” cooling is essential for video.
- Fill Light: This is a secondary, less powerful light (or a reflector) placed on the opposite 45-degree side. Its only job is to “fill in” the dark shadows created by the Key Light.
- Backlight (or Rim Light): This light is placed behind your subject, (out of the camera’s view), pointing at their head and shoulders. This creates a subtle, beautiful “rim” of light that separates your subject from the background, adding a ton of depth.
Understanding Color Temperature (Kelvin)
Ever notice how some light looks “warm” (orange) and some looks “cool” (blue)? This is color temperature, measured in Kelvin (K).
- Indoor Bulbs: ~3200K (Warm)
- Sunlight/Daylight: ~5600K (Cool)
The #1 Rule: Do not mix light sources. If you are using a window (cool) for your main light, turn off all the indoor bulbs (warm) in the room. If you are using bi-color artificial lights (like the Culpixel models), set them all to the same color temperature (e.g., 5600K for a daylight look, or 3200K for a cozy indoor look). Mixing them will result in an unpleasantly colored and unprofessional video.
Chapter 4: DIY & Budget Hacks to Start Today
You don’t need a $1,000 budget. You can create a professional-looking setup for almost nothing.
- The “Book Light”: Don’t have a softbox? Take a bright desk lamp (use a cool LED bulb) and aim it at a white wall or ceiling next to you. The light that bounces back onto your face will be incredibly soft and diffused.
- DIY Reflector: A $1 piece of white foam board from a craft store is the single best lighting tool you can buy.
- DIY Diffuser: Take a bright, “hard” lamp and tape a piece of baking paper (parchment paper) or a white t-shirt over it. This will instantly soften the light. (Warning: Use LED bulbs, as hot incandescent bulbs can be a fire hazard).
Bonus Chapter 5: Beyond Lighting – Mastering Your Audio
You’ve perfected your lighting, and your video looks professional. But what does it sound like? Great video is 50% audio. The tiny microphone on your smartphone is designed to pick up your voice from 12 inches away, not from across a room.
To instantly go from amateur to pro, you need a dedicated microphone.
The Plug & Play Solution: A wireless system like the Culpixel Wireless Microphone Mic One is built for modern creators.
- Clean Audio: It uses Smart Noise Cancellation to eliminate background noise, so your voice is clear whether you’re in a quiet room or a windy park.
- Total Freedom: With a 20-meter (65-foot) range, you aren’t tethered to your phone.
- Shoot All Day: The mic lasts 6 hours, but the portable charging case extends that to 30 hours, so you’ll never run out of power mid-shoot.
- Works With Everything: It’s “plug & play,” meaning it requires no apps and connects automatically. With both Lightning and USB-C adapters, it works seamlessly with your iPhone, Android, or even a laptop.
Conclusion: Your Journey is Complete
Great lighting is the bridge from amateur to pro. Great audio is the other half of that bridge.
It’s not about buying the most expensive gear; it’s about understanding how light works and why sound matters. Start simple. Master natural light, then add one artificial light and a quality microphone. With these tools, you’ll be well on your way to creating content that truly stands out.